But what if we told you there’s a better way, a brighter path, if you will? That’s right, folks! It’s time to shine a light on the unsung hero of our nighttime adventures – walkway lights.
Walkway lights, our friendly path illuminators, not only save us from embarrassing trips and falls, but they also add a dash of elegance to our homes. It’s like the red carpet treatment for every return home, minus the paparazzi!
So, come along with us on this enlightening journey as we delve into the captivating world of walkway lights. By the end, we guarantee that you’ll be glowing with ideas!
5 ideas to illuminate a walkway
1. Outdoor Spot Lights with Arrow Gobo

Light the Way: Guide Your Guests with a Gobo Arrow Spotlight
Imagine creating a trail of light for your guests to follow, like a modern-day treasure map. With an outdoor spotlight and a gobo, you can project an arrow onto your walkway, guiding visitors to your doorstep in the most stylish way.
To carry out this creative idea, you’ll need an outdoor spotlight with a gobo holder, an arrow-shaped gobo, and basic installation tools.
Before making a purchase, ensure the spotlight is weather-resistant and has a gobo holder that fits the size of your chosen gobo. The brightness should be sufficient to ensure the arrow projection is clear, even in dimly lit areas.
To install, follow the manufacturer’s instructions to mount the spotlight at the desired location. The height and angle should be such that the arrow gobo is projected clearly on the intended surface. Once the spotlight is installed, insert the gobo into its holder and adjust the focus as needed.
Additional tip: Consider the path of your guests and the natural flow of your outdoor space when deciding where to project the arrows. Regular cleaning of the gobo and lens will ensure a crisp, clear projection at all times.
2.Outdoor Flood Lights with Sensor

Light Up the Night: Automatic Illumination with Sensor-Activated Flood Lights!
Let’s paint a picture – you’re walking up your garden path on a dark night, when suddenly, the path lights up before you, guiding your way safely. Sounds like magic, right? Well, this magic is made possible with outdoor floodlights equipped with sensors.
To bring this idea to life, you’ll need a number of outdoor floodlights with motion sensors, depending on the length of your path, and installation tools. If you’re not comfortable with electrical work, you might also need the services of a professional electrician.
Before buying, ensure the floodlights are suitable for outdoor use, weather-resistant, and have an appropriate sensing range. Check if the lights have an adjustable timer feature, so they’ll switch off automatically after a certain period of inactivity.
To install these lights, follow the manufacturer’s instructions to mount the lights at the desired locations along the path. The lights should be positioned to cover the full span of the path, and the sensors should face the direction from which movement is most likely to be detected.
Additional tip: Test the sensitivity of the sensors after installation to ensure they pick up movement at the right distance and don’t get triggered unnecessarily. Regular cleaning and maintenance will ensure your lights continue to function effectively.
3. Fairy Lights Ceiling along the pathway

Create a Magical LED ceiling with Fairy Lights!
Imagine walking under a twinkling sky, right in your backyard! This charming idea combines utility and aesthetic appeal, transforming your path into a magical, starlit walkway.
To carry out this enchanting idea, you’ll need a considerable number of LED fairy lights (depending on the length of your path), hooks or clips for hanging, and an outdoor-rated extension cord if your path is far from a power source.
Before buying, ensure the fairy lights are suitable for outdoor use and weather-resistant. Check the length of each string of lights and make sure they can connect end-to-end. Also, consider the color of the lights. Warm white tends to create a cozy, inviting atmosphere.
Start by planning your design. You may want the lights to hang in straight lines across the path or in a more whimsical, draped pattern. Install your hooks or clips along the path, then string the fairy lights between them, making sure the start of the string is near a power source.
Additional tip: Make sure to secure the lights well so they don’t sway too much in the wind. Check the lights periodically for any burnt-out bulbs and replace them promptly to maintain the overall look. And remember, even though your lights are outdoor-rated, taking them down in extreme weather will prolong their life.
4. Use RGB LED Flex Light Ropes for the pathway

Create a Vibrant Path Border with RGB LED Flex Light Ropes!
Picture this: a walkway bordered by a pulsating ribbon of light, guiding your way with a rainbow of colors. Not only does this make your path safer, but it also turns it into an enchanting visual experience!
To execute this vibrant idea, you’ll need RGB LED flex light ropes, suitable mounting channels to house the ropes, a low-voltage power supply, and installation tools.
Before buying, ensure the light ropes are suitable for outdoor use and have the desired color-changing capabilities. The length of the rope should be sufficient to cover the length of your path on both sides. Verify that the mounting channels are compatible with the size of your light rope and are sturdy enough for outdoor users, check that the RGB LED Flex Light Ropes are low voltage
Start by installing the mounting channels along both sides of your path. Once the channels are securely in place, insert the RGB LED flex light ropes into the channels. Connect the light ropes to the low-voltage power supply, ensuring that all connections are safe and weatherproof.
Additional tip: Regularly check and clean the light ropes and channels to ensure they are free of dirt and debris. You might want to experiment with different color settings and movements to create the atmosphere that suits you best.
5. Use of lighting lanterns along the pathway

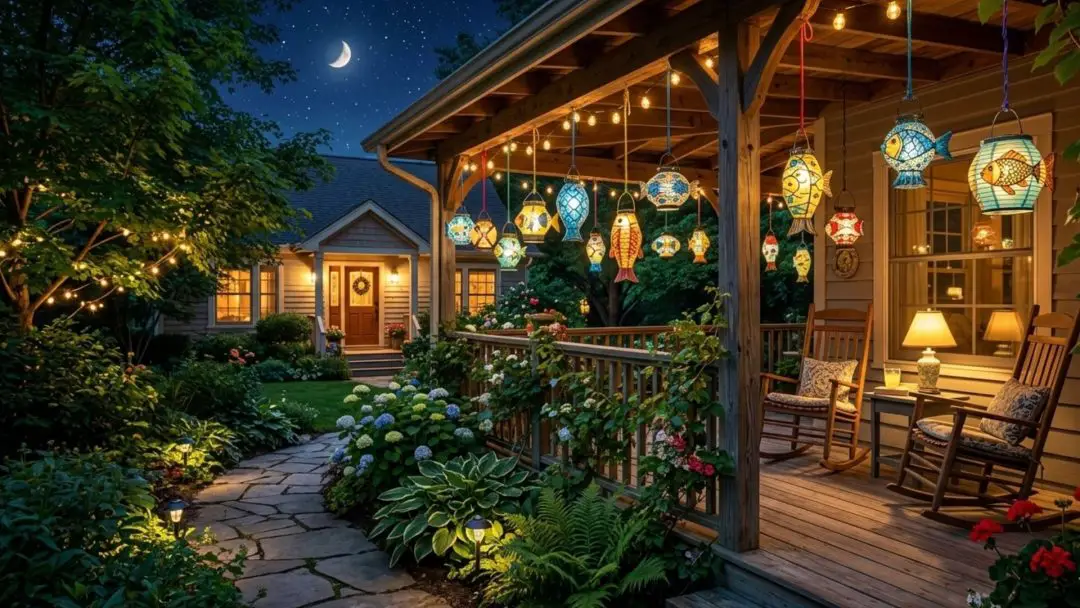
Old-World Charm: Illuminate Your Path with Elegant Lighting Lanterns!
Let’s take a step back in time and bring some old-world charm to our paths. Lighting lanterns, with their warm glow and classic appeal, can turn a simple walkway into a path straight out of a fairy tale!
To bring this idea to light, you’ll need a number of lanterns (depending on the length and width of your path), outdoor-rated lantern lights or candles, and possibly mounting stakes or hooks if you want to elevate your lanterns.
Before buying, ensure the lanterns are suitable for outdoor use and can accommodate your chosen light source. The size and style of the lanterns should fit well with the aesthetic of your outdoor space.
Begin by deciding where you’d like to place your lanterns along your path. You might choose to place them directly on the ground, or mount them on stakes or hooks for a lifted glow. Once your lanterns are in place, insert your lights or candles, and voila! You have an enchantingly illuminated path.
Additional tip: If you’re using real candles, remember to extinguish them after use. For an easier and safer option, consider battery-operated candles or outdoor-rated string lights. Regular cleaning and maintenance will keep your lanterns looking their best.
Types of Solar Walkway Lights: Finding Your Perfect Path Illumination
When it comes to lighting up our paths, solar walkway lights are a fantastic, eco-friendly option. They absorb energy from the sun during the day and light up the darkness when the sun sets, all while reducing your energy footprint. But did you know there are various types of solar walkway lights to choose from? Let’s delve into the different styles and their unique advantages.
Solar Pathway Lights

These are the most common type of solar walkway lights, typically designed as stake-style lights that can be easily pushed into the ground. They provide soft, ambient lighting that’s perfect for outlining the edges of a pathway.
The best way to use them is to place them at equal intervals along the sides of a path. Installation requires no wiring; simply push them into the ground where they can get ample sunlight. On a full charge, these lights typically last around 6-8 hours. The durability depends on the quality of the product, but with good care, they should last a few years before needing replacement.
Solar Bollard Lights

Bollard lights are taller and more substantial than typical pathway lights, making them great for lighting larger areas. They emit a stronger, more concentrated light, making them ideal for wider paths or entrances.
They are typically installed by securing them to a base in the ground. These lights need a sunny location to function optimally, and can provide light for around 6-12 hours on a full charge. Their robust construction means they often last several years before requiring replacement.
Solar Spotlights

These are adjustable lights designed to highlight specific features along your walkway, such as a special plant or a garden statue. They produce a focused beam of light and are best used to draw attention to specific landscape features.
Spotlights typically need to be secured to the ground with stakes, and they should be placed where they can get a lot of sunlight. They usually work for about 6-10 hours on a full charge. Depending on the quality, they can last several years before needing replacement.
Solar Lanterns

These can be hung from hooks or placed directly on the ground, offering a warm, inviting light that’s less directional than other types. They’re perfect for creating a cozy, old-world ambiance along your path.
They require a hanging or sitting place and should be placed where they can receive plenty of sunlight. On a full charge, most solar lanterns can provide light for 6-8 hours. The lifespan of solar lanterns varies widely, but with good care, they can last several years.
Solar In-ground Lights

These are installed flush with the ground, making them great for creating dramatic lighting effects and preventing tripping hazards. They emit an upward light that’s great for marking the edges of a path or highlighting the base of a feature like a tree or a statue.
Installation requires creating a hole or recess in the ground. They need a location that gets ample sunlight and can typically provide light for about 6-8 hours on a full charge. With proper installation and care, these lights can also last several years before needing replacement.
FAQ: What transformer do you need for led walkway lights?

To determine what transformer you need for LED walkway lights, you’ll need to consider a few factors including the total wattage of your lighting system, the type of power source, and the distance of the lights from the transformer.
Total Wattage: The first step is to calculate the total wattage of your LED walkway lights. This can be done by multiplying the wattage of a single light by the total number of lights. For instance, if each light uses 5 watts and you have 10 lights, the total wattage will be 50 watts.
Transformer Capacity: The capacity of the transformer should be greater than the total wattage of your lights to ensure optimal performance and longevity of your lighting system. Most professionals recommend a transformer that has a capacity 25% greater than the total wattage. So, in the above example, a transformer with a minimum capacity of 62.5 watts (50W total wattage + 25% buffer) would be suitable.
Voltage Type: LED lights typically use low voltage (12V or 24V) power, so a low voltage transformer is necessary. These transformers convert the standard household voltage of 120V to a lower voltage suitable for LED lights. They come in a variety of capacities to accommodate different lighting loads.
Distance: The distance of the lights from the transformer can impact voltage drop, which is a decrease in electrical voltage that occurs as electricity travels along a wire. If the lights are located a significant distance from the transformer, a higher capacity transformer may be necessary to compensate for voltage drop.
Type of Transformer: There are different types of transformers available, including electronic and magnetic transformers. Electronic transformers are generally more compact, lighter, and less expensive, but they may produce a buzzing noise and have a shorter lifespan. Magnetic transformers, on the other hand, are more durable, quieter, and better for longer distances, but they are larger and more costly.
Constant Current vs Constant Voltage: LED lights typically require either a constant current (CC) or constant voltage (CV) power supply. Check the specifications of your lights to find out which they require.
IP Rating: If the transformer is to be installed outside, it should have a suitable IP rating for outdoor use to protect it from dust and water.
Dimmable or Non-dimmable: If you want to use a dimmer switch with your LED walkway lights, you will need a dimmable LED transformer.
Remember, when installing a transformer for your LED walkway lights, always follow the manufacturer’s instructions and safety guidelines. For complex installations, it may be best to hire a professional.
To determine the type of transformer you need for your LED walkway lights, you need to calculate the total power consumption (wattage) of all your lights, and then find a transformer that can handle that load. Here’s a simple formula:
Calculate Total Wattage: Add up the wattage of each LED light you plan to install.
Formula: Total Wattage = Wattage of LED 1 + Wattage of LED 2 + … + Wattage of LED n
Example: If you have 10 LED lights each consuming 5 watts, the total wattage would be 10 LEDs * 5 watts = 50 watts.
Choose a Transformer: Find a transformer that can handle at least the total wattage you calculated. It’s generally a good idea to choose a transformer that can handle a little bit more than your total, to avoid overloading the transformer and to allow for future additions.
As a rule of thumb, the transformer should be rated for at least 20% more than the total wattage of your lights.
Formula: Transformer Wattage = Total Wattage * 1.20
Example: If your total wattage is 50 watts, you should choose a transformer rated for at least 50 watts * 1.20 = 60 watts.
Remember, the transformer also needs to output the correct voltage (usually 12V or 24V for LED lights), and it should be rated for outdoor use if it will be installed outside. Always consult with a professional electrician if you’re unsure.
Example
let’s say you’re planning to install 15 LED walkway lights, each rated at 4 watts, and they operate at 12V DC.
Step 1: Calculate Total Wattage: The total wattage is the sum of the wattage of all the individual lights.
Total Wattage = Wattage of each LED * Number of LEDs = 4 watts * 15 = 60 watts
So, the total wattage of your walkway lights is 60 watts.
Step 2: Choose a Transformer: You should choose a transformer that can handle at least 20% more than your total wattage to avoid overloading.
Transformer Wattage = Total Wattage * 1.20 = 60 watts * 1.20 = 72 watts
So, you should choose a transformer that is rated for at least 72 watts.
Additionally, since your LED lights operate at 12V DC, you’ll need a transformer that converts your home’s standard line voltage (usually 120V or 240V AC, depending on your country) to 12V DC.
In this example, you would look for a transformer (or LED driver) that is rated for at least 72 watts and outputs 12V DC. Remember to ensure that it is suitable for outdoor lighting use if it will be installed outside.
In the United States, the standard line voltage is 120V AC. If we’re considering LED lights that operate at 12V DC and we want to include a safety margin of 20% in the transformer capacity, we can use the following calculations:
| Total Wattage of LEDs | Transformer Wattage Required |
| 10W | 10W * 1.20 = 12W |
| 15W | 15W * 1.20 = 18W |
| 20W | 20W * 1.20 = 24W |
| 25W | 25W * 1.20 = 30W |
| 30W | 30W * 1.20 = 36W |
| 50W | 50W * 1.20 = 60W |
| 75W | 75W * 1.20 = 90W |
| 100W | 100W * 1.20 = 120W |
Remember, these calculations assume that the LED lights operate at 12V DC and that we want to include a safety margin of 20% in the transformer capacity to avoid overloading.
If the lights operate at a different voltage or if you want to use a different safety margin, the required transformer wattage will change. Always consult with a professional electrician if you’re unsure.
Lighting the Way Forward: The Final Touch

As we draw this enlightening journey to a close, remember that walkway lighting is not only functional, it can also greatly enhance the aesthetic appeal of your outdoor spaces. Whether you’re using spotlight projectors, motion-sensor floodlights, fairy light ceilings, LED rope lights, or classic lanterns, each method has its own unique charm and benefits.
With careful planning, you can transform your walkway into a radiant path that beautifully bridges your outdoor spaces. Don’t be afraid to experiment and let your creativity shine!