Imagine a world where the knotty nightmares of traditional light strings are a thing of the past.
That’s right, we’re talking about those grid-like wonders that transform your outdoor spaces into a twinkling tableau with the ease of a magician’s cloak.
Net lights, our focus today, are not just for the festive season anymore; they’re year-round marvels in the world of outdoor lighting.
So, let’s untangle the mystery and weave through the bright world of these convenient, versatile, and downright enchanting lights. Get ready to light up your knowledge – and maybe your backyard too!
6 Stunning Net Lights Ideas You Need to Know Now
Alright, let’s shed some light on creativity! Are you ready to take your net lighting game to the next level? You’re in luck because we’ve scoured the world of outdoor lighting to bring you six stunning net light ideas that are sure to spark your imagination.
From classic elegance to modern flair, these ideas are not just about lighting up a space; they’re about creating an ambiance that could make even the moon jealous.
So, grab your favorite beverage, find a comfy seat, and let’s dive into these brilliant, can’t-miss net light concepts that promise to transform your outdoor space from mundane to mesmerizing – one bulb at a time!
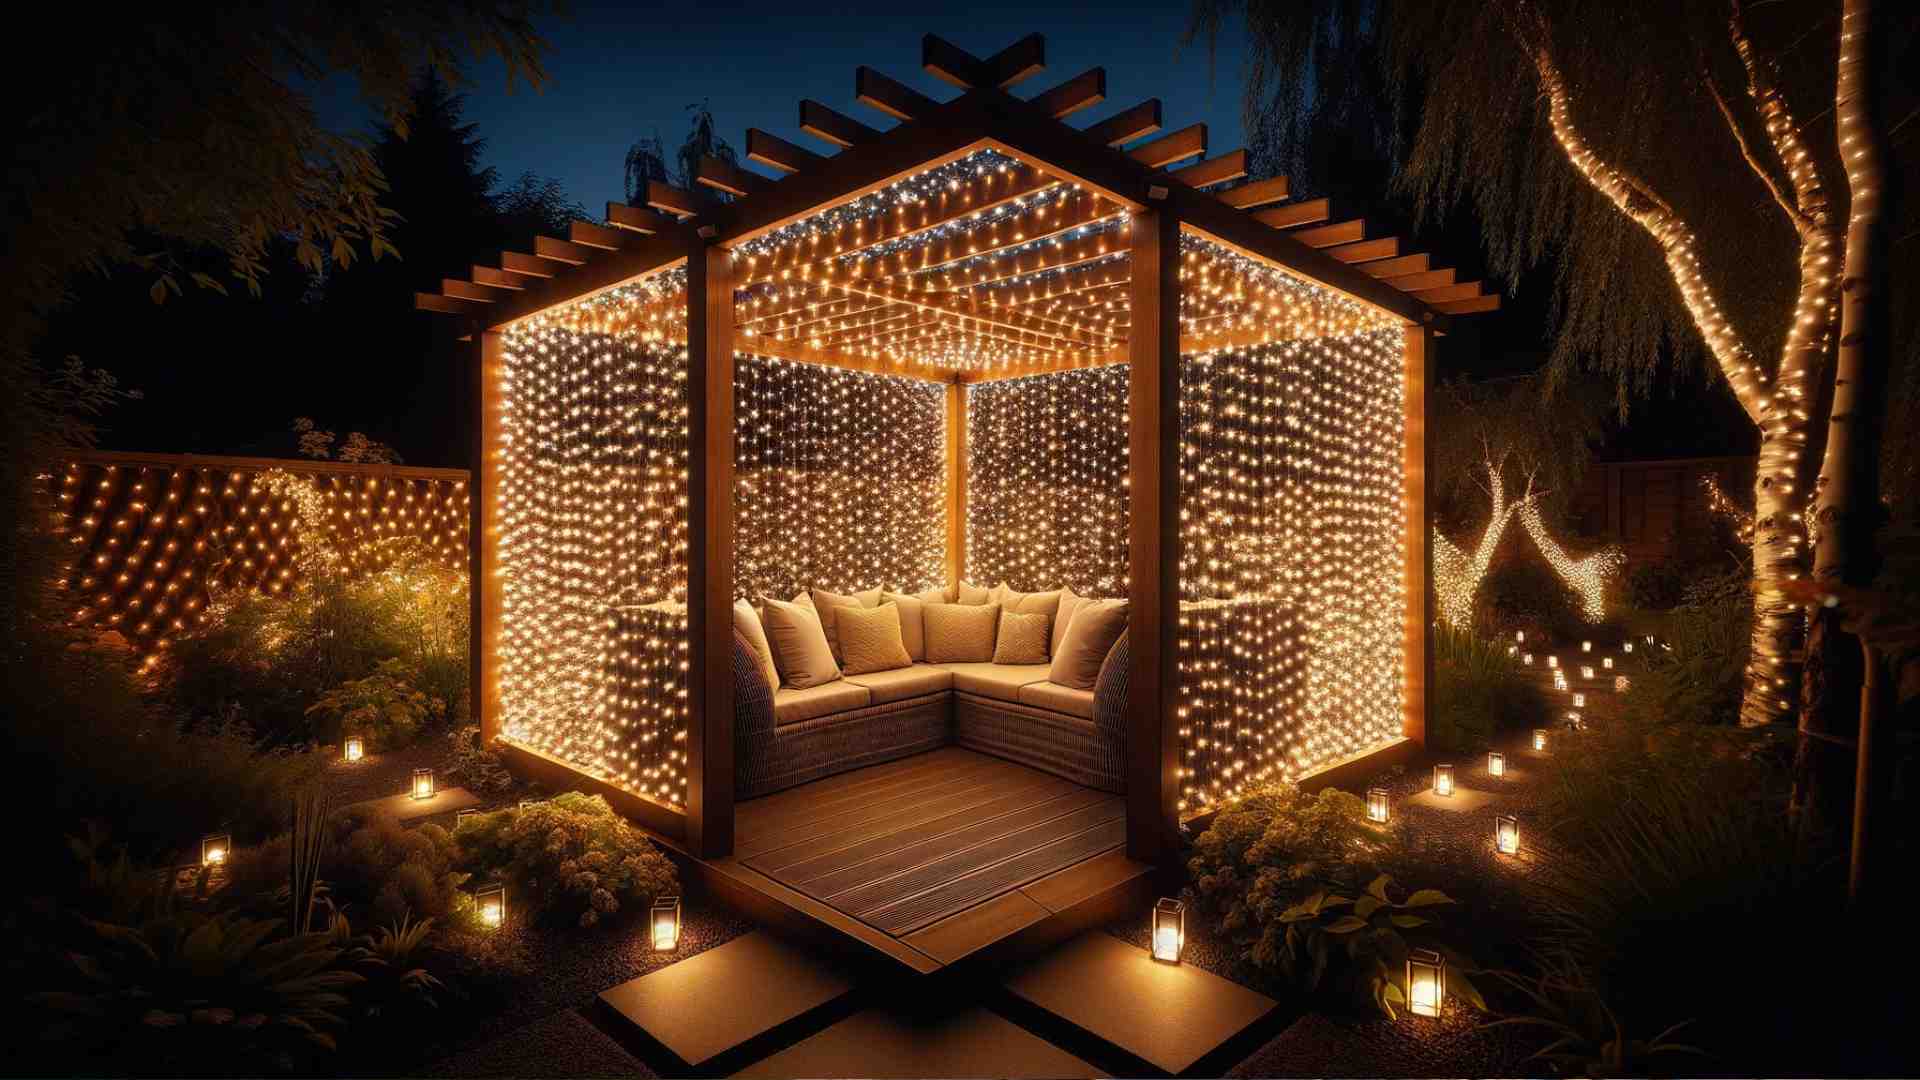
1. Create Enchanting Pergola Walls with Net Lights

Transform your garden pergola into an enchanting retreat with the soft glow of net lights. This idea isn’t just a visual treat; it offers a host of benefits that make it a shining choice for any outdoor lighting enthusiast.
Net lights draped over your pergola create a canopy of stars, providing a gentle illumination that extends your living space into the great outdoors.
It’s an energy-efficient way to enhance the ambiance for those late-night conversations or peaceful solo moments under the stars. Plus, the uniform distribution of lights adds a touch of sophistication to your backyard soirées without the complexity of individual string lights.
Benefits:
- Quick and easy installation
- Even light distribution
- Low maintenance
- Versatile décor for various occasions
- Energy-efficient LED options available
Step-by-Step Guide to Creating Pergola Walls with Net Lights:
- Measure Your Space: Start by measuring the height and width of your pergola to determine the size and number of net light sets you’ll need.
- Choose Your Lights: Select net lights that are suitable for outdoor use, preferably LED for better energy efficiency and longevity.
- Check for Power Sources: Ensure there’s a convenient outdoor power outlet nearby; if not, you might need an extension cord rated for outdoor use.
- Start at the Top: Begin by draping the net lights over the top of the pergola, securing them with cable ties or hooks to ensure they stay in place.
- Create the Walls: Gently drape additional sets of net lights down the sides of the pergola to create luminous walls, attaching them securely at the corners.
- Connect the Lights: Plug the end of each net light set into the adjacent one, being mindful of the manufacturer’s guidelines for how many sets can be connected.
- Hide the Cords: Tuck away any excess cords or cables to keep your setup neat and to avoid tripping hazards.
- Test Your Lights: Once everything is in place, turn on the lights to check for even coverage and to ensure all bulbs are working.
- Add Some Flair: Feel free to intertwine some greenery or flowers among the lights for a more natural look that complements your garden.
- Enjoy the Ambiance:With everything set up, it’s time to sit back, relax, and bask in the gentle radiance of your newly transformed pergola.
Now, imagine sitting beneath a canopy of glowing warmth, the soft light casting a welcoming ambiance for any after-dusk activity. It’s the perfect setting for making memories, whether it’s a quiet evening with a book or a lively gathering with loved ones. Enjoy the magic of your pergola turned starlit sanctuary, all with the simple addition of net lights.
2. Create an Illuminating Field with Net Lights

Transforming your garden’s ground into a radiant field of light isn’t just about adding beauty; it’s about creating an immersive experience.
By covering grassy areas with net lights, you bring a touch of enchantment to your outdoor space. This concept is not only visually captivating but also practical, providing subtle guidance along pathways during evening strolls.
This creative idea is a brilliant way to highlight the lushness of your lawn while keeping energy consumption to a minimum, especially with LED options. Plus, it’s a conversation starter at any outdoor gathering, drawing eyes and sparking imaginations with its carpet of warmth.
Benefits:
- Enhances the beauty of your outdoor space
- Provides gentle, ambient lighting
- Energy-efficient when using LED net lights
- Easy to install and remove
- Durable and weather-resistant options available
Step-by-Step Guide to Creating Illuminating Fields with Net Lights:
- Measure Your Area: Determine the size of the grass or ground area you want to cover to ensure you have enough net lights to create an even spread.
- Choose the Right Lights: Opt for weather-resistant, outdoor-rated net lights for durability and long-term use.
- Prepare the Ground: Clear the area of any debris or sharp objects that could damage the net lights.
- Lay Down the Lights: Starting at the nearest power source, roll out the net lights across the ground, carefully spreading them to cover the area evenly.
- Secure the Edges: Use garden staples or stakes to gently secure the edges of the net lights to the ground, ensuring they are snug but not overly tight.
- Connect and Extend: If your area requires multiple net lights, connect them end-to-end, keeping in mind the manufacturer’s limits on connections.
- Conceal the Cords: Arrange the connecting cords so they are hidden and do not create a trip hazard.
- Power Up: Plug the net lights into an outdoor-rated, weatherproof power outlet or extension cord.
- Test the Look: As evening falls, turn on the lights to ensure there are no gaps in coverage and that the effect is as desired.
- Add Finishing Touches: For an even more magical effect, consider adding some landscape lighting around the perimeter to complement your glowing ground.
With your grass or ground now aglow like a field of tiny stars, you’ve not only increased the whimsy in your garden but also improved visibility for those twilight hours. This blanket of light provides a practical solution that doesn’t sacrifice aesthetics, making every inch of your outdoor space a part of the overall ambiance.
Whether for a special occasion or to simply enjoy every evening, your illuminated field is now ready to shine.
3. Make Your Backyard Bushes Sparkling with Net Lights

Who says bushes should only be green? It’s time to give your garden’s low-lying shrubs their moment to shine with the simple addition of net lights.
This dazzling idea is not only a quick way to elevate your backyard’s night time appeal but also a practical approach to landscape lighting.
Net lights envelop your bushes in a cozy glow, enhancing their natural shapes and turning them into a radiant feature after dark. It’s an effortless way to create a festive atmosphere all year round or to add that special sparkle for seasonal celebrations.
Benefits:
- Fast and even coverage of light
- Minimal effort compared to string lights
- Adds a decorative touch to landscaping
- Enhances safety by improving visibility
- Energy-efficient with the use of LED lights
Step-by-Step Guide to Making Your Backyard Low Bushes Sparkle with Net Lights:
- Measure Your Bushes: Determine the width and height of your bushes to select net lights of appropriate size.
- Select Your Lights: Choose net lights with bulbs that complement the size of your bushes and opt for LED lights to conserve energy.
- Prep Your Greenery: Trim and shape your bushes if necessary, ensuring a neat canvas for your lights.
- Unravel the Net: Gently unfold your net lights and detangle any knots without pulling too hard on the wires.
- Drape Over Bushes: Carefully lay the net lights over your bushes, starting from the top and working your way down.
- Secure the Lights: Tuck the edges of the net lights into the bush to secure them in place, or use garden staples sparingly if needed.
- Connect the Nets: If your bushes are large, you may need to connect multiple nets. Make sure to use the waterproof connectors for outdoor use.
- Power Source: Plug your lights into an outdoor-rated extension cord, and make sure the outlet is equipped with a ground-fault circuit interrupter (GFCI) for safety.
- Evening Test:Wait for dusk and then turn on your net lights to admire the coverage and adjust as needed for an even sparkle.
- Enjoy the Glow: With your bushes now dressed in their lighted best, step back and enjoy the whimsical touch they add to your outdoor sanctuary.
Your backyard bushes are now not just plants, but beacons of light that invite you and your guests to enjoy the garden long after the sun sets.
Whether it’s for a quiet evening under the stars or a lively backyard bash, these sparkly shrubs are sure to be the highlight of your outdoor space.
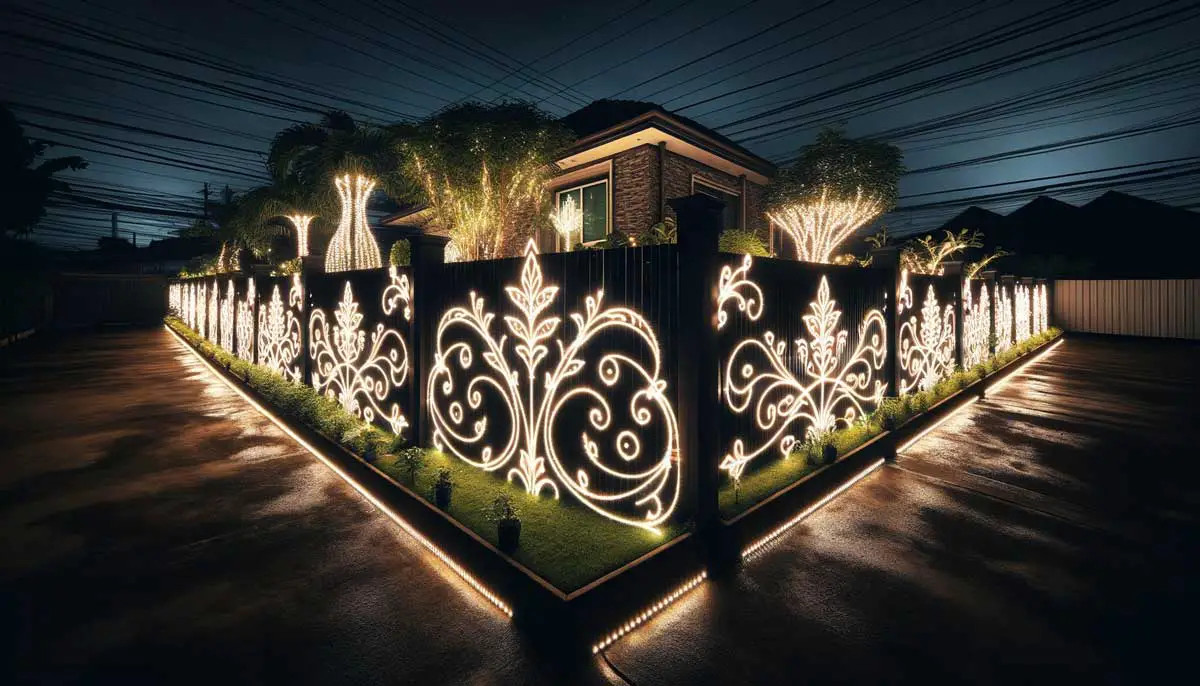
4. Transform Your Fence into an Enchanting One with Net Lights

Let’s face it, fences do a great job at defining boundaries and offering privacy, but they’re not always the life of the party. It’s time to change that narrative by adorning them with net lights!
This bright idea not only adds a splash of sparkle to your outdoor space but also serves as a beacon for backyard bliss.
Net lights provide a uniform glow that transforms your fence into a backdrop of brilliance, perfect for every occasion, from serene summer nights to spirited seasonal parties. It’s a simple upgrade that promises to deliver maximum visual impact with minimum effort.
Benefits:
- Quick and easy installation process
- Creates a vibrant and inviting outdoor atmosphere
- Enhances backyard privacy with a stylish twist
- Offers a visually pleasing alternative to traditional fence lighting
- Energy efficiency when you choose LED net lights
Step-by-Step Guide to Making Your Fence Sparkle with Net Lights:
- Measure Your Fence: Grab a tape measure and get the length and height of your fence to determine how many net lights you’ll need.
- Pick the Perfect Lights: Opt for durable, outdoor-rated net lights. Going for LED lights? Even better, for they’ll save energy and last longer.
- Prep Your Fence: Clean the fence surface to ensure your lights adhere well and look their best.
- Start at the Corner: Begin at the corner nearest to your power source. It’s all about location, location, location.
- Secure the Top: Attach the top corner of the net light to the fence using clips or hooks designed for outdoor use.
- Unroll and Attach: Gently unroll the net lights along the top of the fence, securing them at intervals to keep the net taught and tidy.
- Drape Down: Carefully drape the net lights down the fence, attaching them at the sides and bottom as needed.
- Connect the Dots: If your net lights aren’t large enough to cover the whole fence, connect additional nets as needed, but don’t exceed the manufacturer’s recommendations.
- Plug It In: Connect your net lights to an outdoor-rated extension cord, and make sure it’s plugged into a GFCI outlet for safety.
- Light It Up: With everything in place, flip the switch and watch your fence turn into a canvas of light.
- Enjoy the View: Take a step back and enjoy your handiwork. Your fence is no longer just a fence—it’s a landmark.
With these steps, your once unassuming fence is now a luminous landmark, casting a warm and welcoming glow over your outdoor haven.
Whether setting the stage for a garden party or simply enjoying an evening alfresco, your lit-up fence is sure to be a conversation starter and mood setter.
5. Make a Canopy of Illumination with Net Lights

If you’re looking to bring the stars into your backyard, creating a lighted ceiling with net lights is like having your own personal constellation.
This innovative lighting idea not only elevates the aesthetic of your outdoor living space but also provides a functional benefit by delivering ambient light that’s soft on the eyes and perfect for setting a relaxing mood.
A lighted canopy offers a visually stunning focal point and extends your living area into the outdoors, creating a seamless transition for entertaining, lounging, or simply unwinding under a blanket of lights.
Benefits:
- Creates a cozy, inviting outdoor environment
- Offers ample, diffused lighting without glare
- Enhances evening ambiance for entertaining
- Quick to install compared to traditional lighting fixtures
- LED options provide energy efficiency and longevity
Step-by-Step Guide to Creating a Lighted Ceiling or Canopy with Net Lights:
- Measure Your Area: Determine the dimensions of the area you want to cover to ensure you have enough net lights for an even canopy.
- Select Suitable Net Lights: Choose outdoor-rated, waterproof net lights, preferably with LED bulbs for durability and energy savings.
- Prepare the Structure: If you’re attaching the lights to an existing pergola or patio cover, make sure it’s clean and free of debris.
- Attach Hooks or Clips: Secure hooks or clips around the perimeter of the structure where you’ll hang the net lights.
- Start at One End: Begin at one end of the pergola or structure, attaching the corner of the net light to a hook or clip.
- Roll Out the Net: Unroll the net lights carefully across the structure, securing each corner and side to maintain even tension.
- Connect Multiple Nets: If needed, connect additional net lights side by side to cover the entire area, checking manufacturer instructions for safe connectivity limits.
- Hide Excess Wires: Neatly tuck away extra wires or cables to keep the setup tidy and prevent any hazards.
- Plug In and Power Up: Connect the net lights to an outdoor power source, using a GFCI outlet for safety.
- Flip the Switch: Turn on your lights to bathe your space in a warm, inviting glow and adjust if necessary to achieve the desired effect.
- Add Personal Touches: Introduce decorative elements like hanging plants or fabric to personalize your lighted canopy.
- Enjoy the Ambiance: Sit back, relax, and enjoy your newly crafted outdoor retreat, perfect for making the most of those warm evenings.
Your outdoor area is now a symphony of lights, offering a gentle glow that transforms every gathering into an occasion and every quiet night into a moment to treasure. It’s not just about visibility; it’s about creating an atmosphere where memories are made and the hustle of the day melts away.
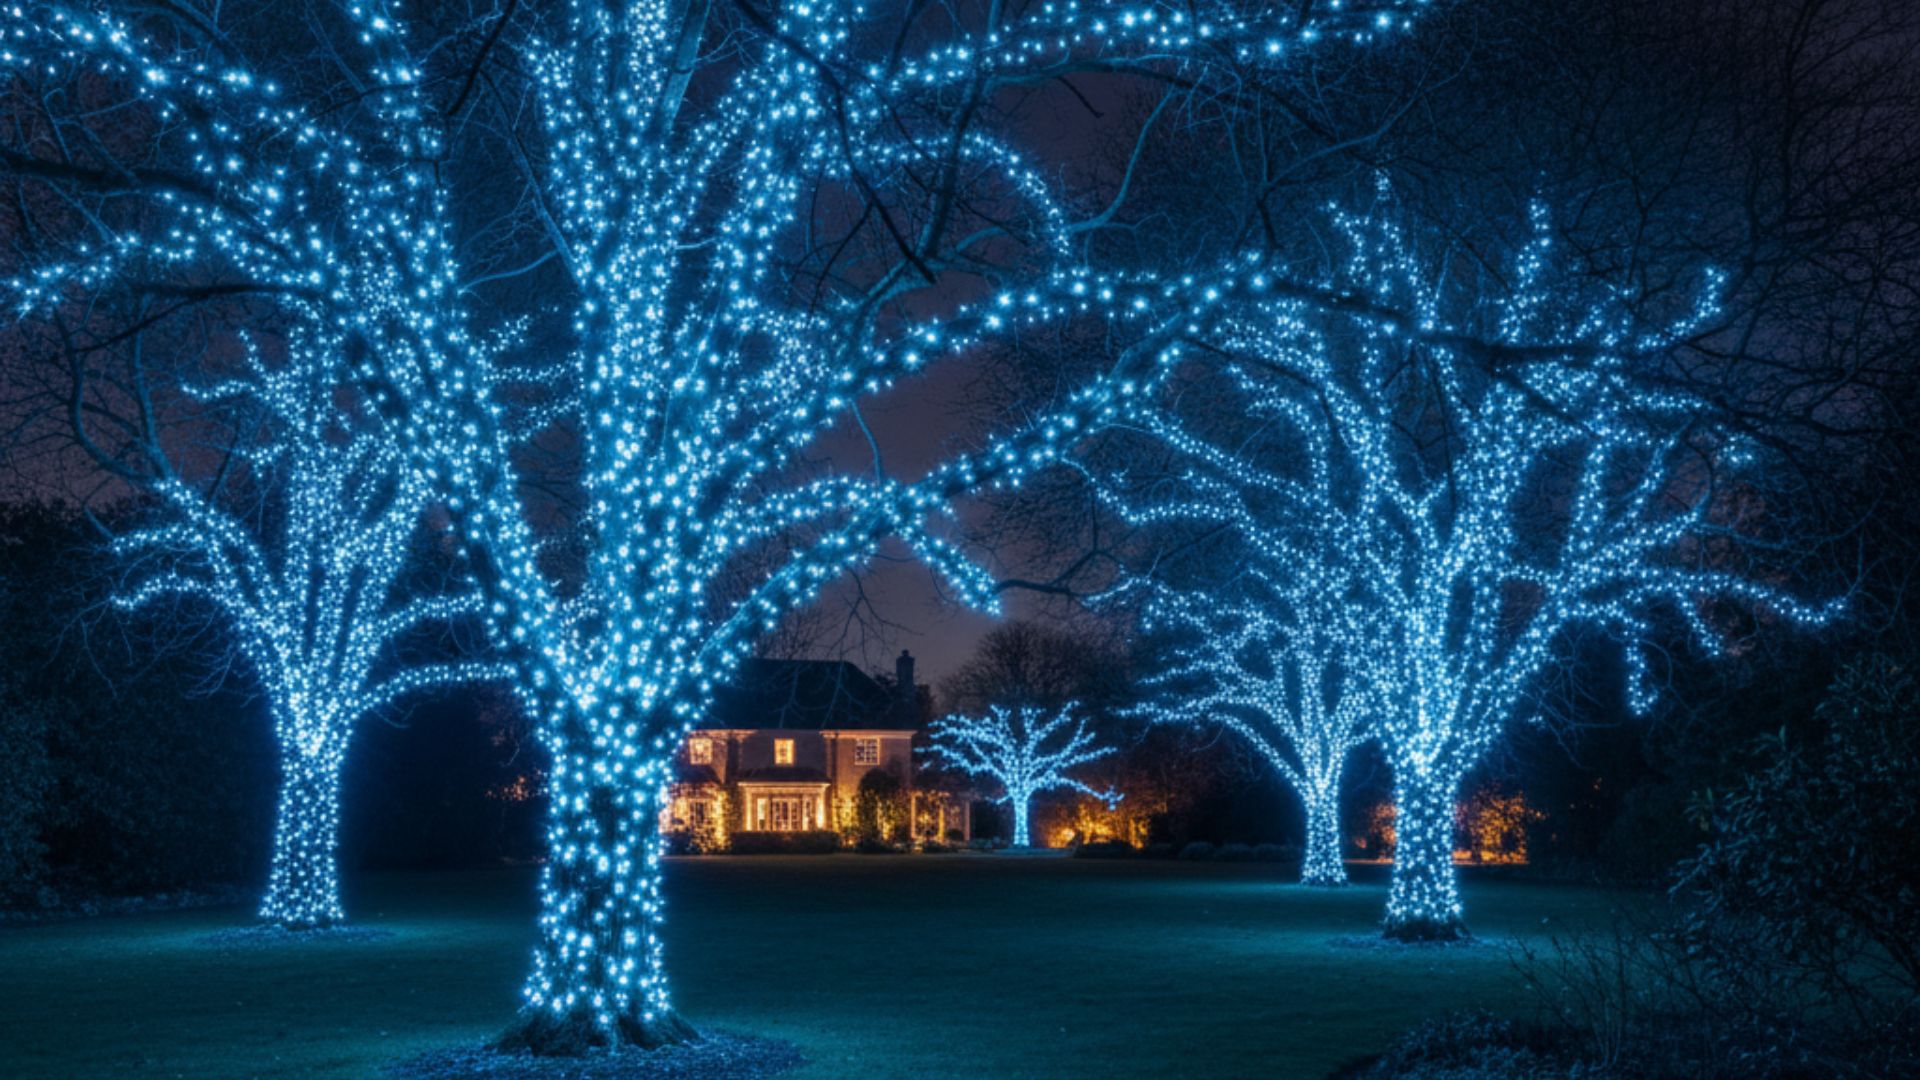
6. Net Lights as Exterior Decorations for Christmas

When the season to be jolly rolls around, there’s no decor quite like net lights to turn the exterior of a house into a winter wonderland.
Using net lights for exterior Christmas decorations isn’t just about making spirits bright; it’s a smart, efficient way to cover large areas with that cozy holiday glow, without the need to individually place every bulb.
This twinkling approach saves time and effort, allowing more of those precious holiday moments with family. Plus, the consistent spacing of net lights gives your home that professional, polished look that’s sure to make it the star of the street.
Benefits:
- Covers large areas quickly and evenly
- Easy to install and take down
- Creates a visually stunning holiday display
- Durable and suitable for various weather conditions
- Can be energy-efficient with LED options
Step-by-Step Guide to Using Net Lights as Exterior Decorations for a House on Christmas:
- Measure the Areas: Know the dimensions of the areas you plan to cover to purchase the correct number of net lights.
- Choose Your Net Lights: Opt for waterproof, outdoor-rated net lights that complement your holiday color scheme.
- Check the Bulbs: Before you start, plug in the net lights to ensure all bulbs are working.
- Prep Your Surface: Clear the gutters and walls of debris where you’ll hang the net lights.
- Start from the Bottom: If you’re covering bushes or ground areas, lay the net lights out, starting from the bottom and working your way up.
- Climb Safely: Use a sturdy ladder to reach higher areas like the roofline or tall bushes, and always have someone spot you.
- Secure the Lights: Use clips or gutter hooks to attach the net lights to the edges of your roof and around windows.
- Connect the Nets: If using multiple net lights, connect them according to the manufacturer’s guidelines, and secure the connectors against moisture.
- Power Source: Plug your lights into an outdoor-rated extension cord, ideally connected to a GFCI outlet.
- Turn on the Twinkle: Light up your decorations to ensure even coverage and adjust as needed for the perfect holiday sparkle.
- Add Individual Touches: Complement the net lights with additional decorations like wreaths or a light-up Santa to personalize your display.
- Stand Back and Admire: Once everything is in place, take a moment to enjoy your handiwork and share the holiday cheer.
With these steps, your home is now not just a house but a beacon of holiday spirit, inviting admiration from all who pass by and spreading the warmth of the season.
A Sparkling Conclusion: Lighting Up Your Imagination with Net Lights
As we wrap up our journey through the world of net lights, we hope we’ve illuminated not just your gardens, fences, and homes but also the spark of your creativity.
Whether you’re draping a pergola, transforming a fence, or making your bushes twinkle like distant galaxies, net lights are your go-to resource for an easy, impactful lighting transformation.
Remember, the beauty of net lights isn’t just in the glow they cast, but also in the simplicity they offer—turning complex lighting feats into a task as easy as flipping a switch.
So, go ahead, let your light shine, and watch as your neighbors do a slow drive-by, awestruck by your dazzling display. Until next time, keep glowing, folks!